


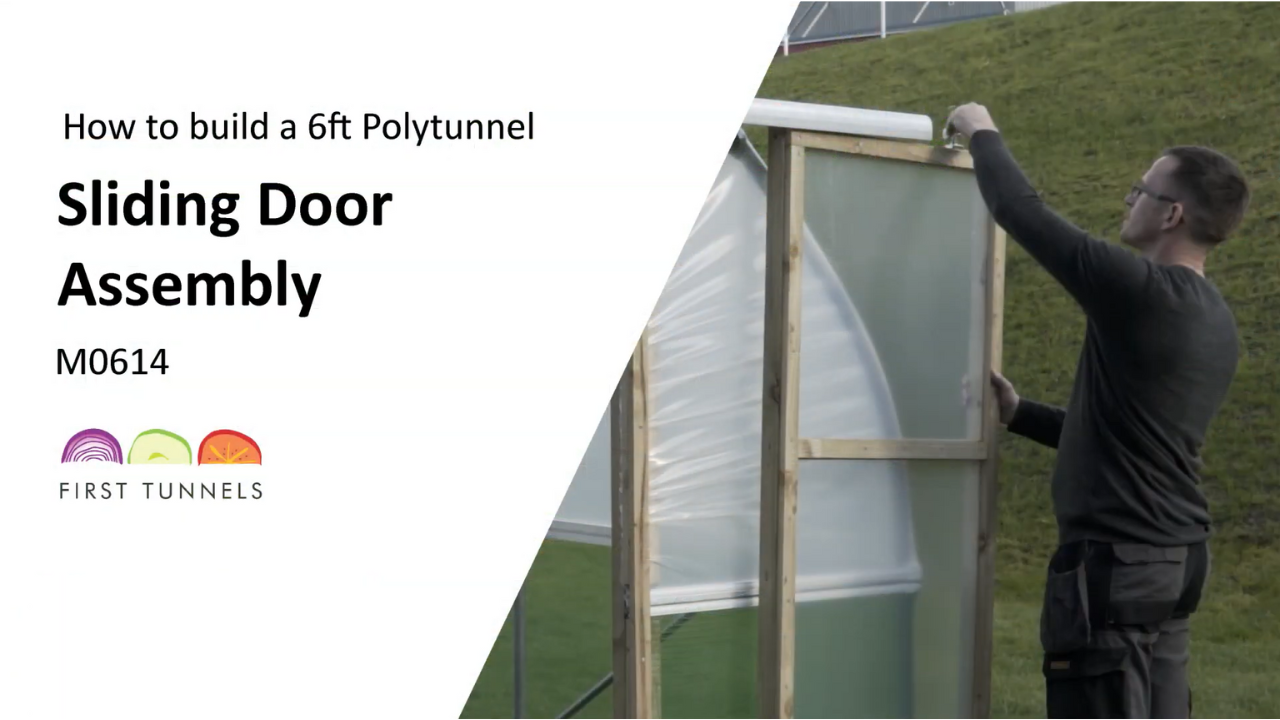


Constructing the doors in the warmth of your garage or on a hard flat surface is easier than trying to perform the operation on site. Both the standard and wide doors are made up of two uprights (50mm x 50mm x 1.8m long) and three cross pieces of the same timber. For standard doors, these cross pieces measure 59.5cm and for wide doors the measurement is 79.5cm.
Drill 3 pilot holes in each upright with a 3mm timber drill bit. Using a tape measure, mark the position of the holes on the upright with a pencil. Holes are required 3cm in from each end of the upright and the third hole needs to be 65cm from one end. Ensure you drill the holes central to the width of the timber (fig 11a/b). Lay the two uprights parallel to each other ensuring that the holes align and then position the three cross pieces between the two uprights centrally with the holes. Once you are happy with the alignment, screw them together using a 75mm screws supplied in the door furniture kit (DDFK1). Strengthen the joints with nail plates supplied in the door furniture kit. Position a nail plate centrally across the joints and nail into place using twisted nails. Nail plates only need to be added to one face of the door (fig 11c/d/e).
The polythene panel (PP2) is fitted to the bottom section of the door and the net panel to the top (NP1) (fig 11f). The top of the door is the end with the smaller rectangle. The panels need fitting to the side which does not have nail plates. Lay the polythene panel over the door, ensure one edge is flush with the middle cross piece and secure using a staple gun. Lay the net panel over the top half of the door and secure to the middle cross piece. Continuing with the net panel , pull it tight to remove any wrinkles and secure it to the top cross piece. Work down one side and secure it to one upright. Pull it tight across the width and secure to the opposite upright. The polythene panel is secured in the same way. Pull it tight to the bottom of the door and secure it to the bottom crosspiece. Secure it to one upright and then pull the polythene panel tight across the width ensuring there are no wrinkles and creases and secure with staple gun. Nail the battens on top of the panels, nails should be approximately 20cm apart. This will further secure the panels in position. The battens are 19mm x 38mm timber and come in 1.8m lengths. If you have standard doors you will have been supplied 3 battens per door. For wide doors you will have 4 battens per door. 2 battens are used on the 2 uprights. The remaining battens will need to be cut to fit onto the 3 crosspieces. Trim the excess off with a sharp knife.
NOTE: The remaining parts from the door furniture kit (DDFK1) will be used later on.
Next make the outer door frame (ODF). We suggest making the door frame around your door to achieve a good fit. The door frame comprises of 3 pieces of 47mm x 75mm timber, commonly known as 3 by 2: the two door posts are 2.4m long and the door frame lintel is 1.6m long (fig 11g). The door frame lintel suits all three variations in door widths; Standard, Wide and Double and will need cutting to size. The remaining pieces supplied in the pack are 19mm x 38mm x 1.8m battens, one of which will be used shortly, and the rest will be used later when fitting your polytunnel cover.
NOTE: If you would like your doors to open outwards this can only be done once the polytunnel cover has been fitted.
Lay the previously assembled door on the floor with the nail plates facing upwards. In the case of double doors lay two doors adjacent to each other. Place a door frame post down each side of the door. On the opposite side ensure there is a 4mm gap between the upright and door frame post to allow for expansion. A useful tip to create the 4mm gap would be to use square twisted nails (fig 11h). The 1.6m door frame lintel timber suits all three variations in door widths; Standard, Wide and Double. It should be cut to fit between the two-door posts (fig 11i). Position the door frame lintel so that the top of the lintel is 24cm down from the end of the door frame post on each side. Make a second mark centrally to the door frame lintel for the pilot hole. Drill a 4mm pilot hole in each post to line up with the centre of the top timber. When you are happy with the alignment of the door top, screw in position using a 150mm screw (DFAK1) (fig 11j). Repeat this on the opposite side.
Ensuring there is a consistent 4mm gap down between the door and the door frame post, cut a piece of batten to size and nail it to each door post, again 4mm below the bottom of the door (fig 11k). This ensures the door frame will remains stable when moving it into position. If fitting to a hard base such as concrete or timber then this batten should be positioned 40cm from the bottom of the doorpost. This will temporarily prevent your door from opening. It will be removed later. The joints on the door top lintel to the door post can now be reinforced through the use of a nail plate on each side of the joint, using a nail plate and twisted nails (fig 11l).
Next the hinges will be fixed (DDFK1). In order to facilitate this, place timber battens (TIB18) underneath the two door posts, this will raise the door frame to the same height of the door to ensure the hinges are fitted correctly. Position the single or double doors within the frame. A 4mm gap is required between the top of the door and the door frame lintel. Measure 30cm from the top and bottom of the door, position the hinge and screw to the door and the door post (fig 11m).
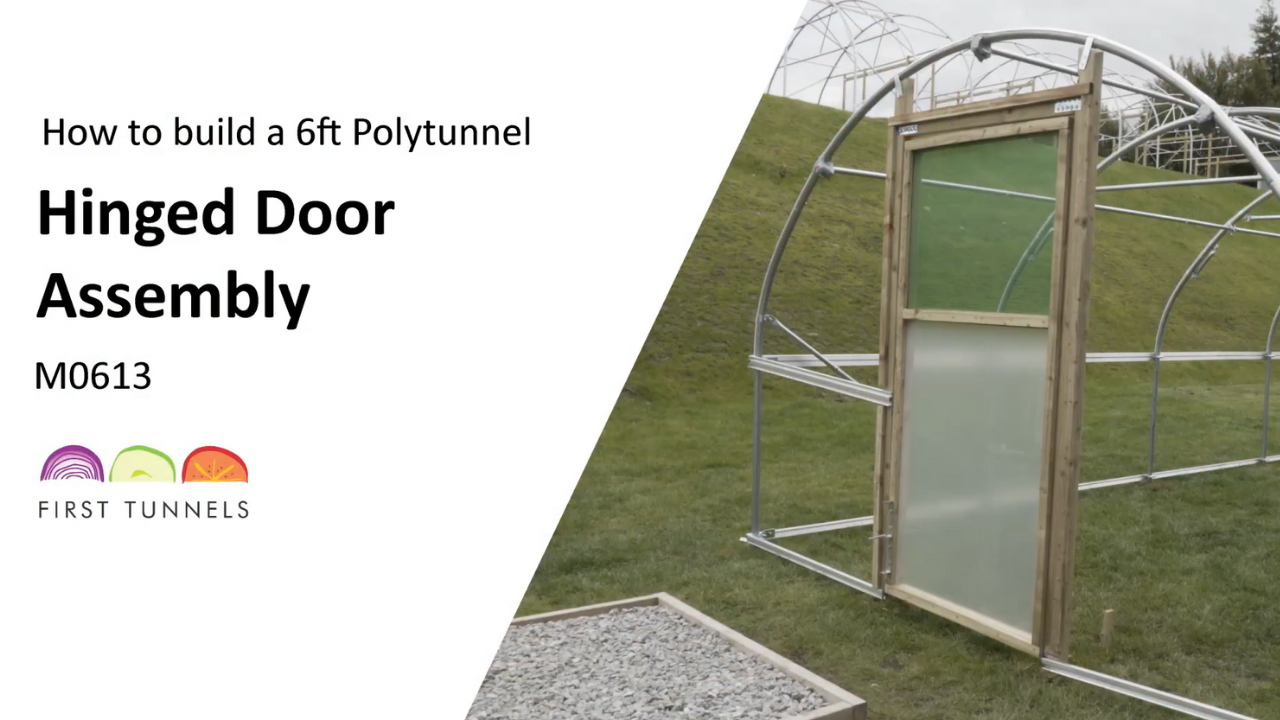
Your door frame is now complete. To fit the door to your polytunnel run a taut string line across the width of your polytunnel on the end hoop across the front of the hoop. Position the assembled door frame centrally to the width and flush with the end hoop and string line. Make a mark on the ground where you door posts are. This identifies the position where you will be required to dig a hole for each door post (fig 11n). If you are fitting to an earth base you will be required to excavate a 30cm square by 40cm deep hole for each door post. If you are on a solid base measure from the bottom of the door 10mm down the door posts and cut off the excess. Reposition the door onto the end hoop. If you are on an earth base ensure you have enough ground clearance to open the door fully. Ensure the door frame is central and vertically level. Draw a line on the door frame posts where it meets the hoop and cut on this line (fig 11o). Reposition the door frame for the final time. Once you are happy with the position secure the top of the door posts to the hoop using P clips. Fit a P clip onto the hoop so that both prongs of the p clip run down the front face of the door frame post. Secure the P clip to the door frame post using the screws provided in the p clip pack (fig 11p). Ensure the door frame lintel is level and then fix the p clips into position by screwing them to the hoop with a self-drilling screw.
To secure the door frame posts to the ground. Position the door frame posts flush with the string line and then secure to the ground. The door may impede the string line, so we suggest doing this next procedure with the doors open. Adjust your door frame so that it touches the string line and then secure to the ground. If on an earth base backfill the hole with soil, or use postcrete for added strength. If on a solid base, fix the base of the plate to the floor using Shield Anchors (LB825) for concrete or Coach Screws (CS850) for timber. Position the door frame post plate on the ground on the inside of your polytunnel, make a mark through the centre hole then remove (fig 11q). If on a concrete base drill a hole 7cm deep using a 14mm masonry drill bit. Separate the bolt and washer from the sleeve and insert through the hole in the door frame post plate and then screw on the sleeve. Locate the shield anchor into the hole and firmly tighten using a 13mm spanner. If on a timber base drill a pilot hole 5cm deep using a 7mm timber drill bit. Reposition the post plate and tighten the coach screw using a 13mm spanner. Finally, screw the plate to the door post using the screws provided (fig 11r). When the door frame posts are secured to the floor you can remove the batten.
NOTE: Do not allow the door to open inwards more than 90º, use wooden stakes. This will prevent any damage to the polythene cover from the top corner of the door. To prevent wind damage, do not leave covered doors hanging in position unless the main cover is in place. Remove the doors if the polytunnel cover is not being fitted imminently.
If you would like the doors to swing outwards this process can be done after the polytunnel cover has been fitted. Remove the doors from the door frame and reposition the hinges so they are on the outside of the door frame. The hinge will be screwed on to the batten of the door frame post upright, longer screws will be required, you will need to source these screws yourself. If you do choose to have your doors opening outwards ensure that you use a small strip of timber so that your door cannot blow inwards, again this timber will need to be sourced by yourself.
Position 2 door drop spike guide brackets (DDFK1) adjacent to each other on the outside face of the door, on the opposite side to the hinges, 9cm up from the bottom of the bottom of the door to the bottom of the lower guide bracket (fig 11s). Mark the position of the 2 slots in each bracket and drill using a 9mm drill bit. On the inside face of the door insert a pronged T nuts into each hole. Bolt the 2 angled brackets to the door with the slot on each bracket at the top. Close the door to the required position, slide the drop spike down through both brackets and mark the position on the ground. Open the door and bury the tube in the required position (fig 11t). If your polytunnel is on a hard base the housing tube is not required. Simply drill a hole using a 9mm drill bit to an appropriate depth. For double doors you will be required to repeat this process on both doors.
Click to enlarge

11a

11b

11c

11d

11e

11f

11g

11h

11i

11j

11k

11l

11m

11n

11o

11p

11q

11r

11s

11t