


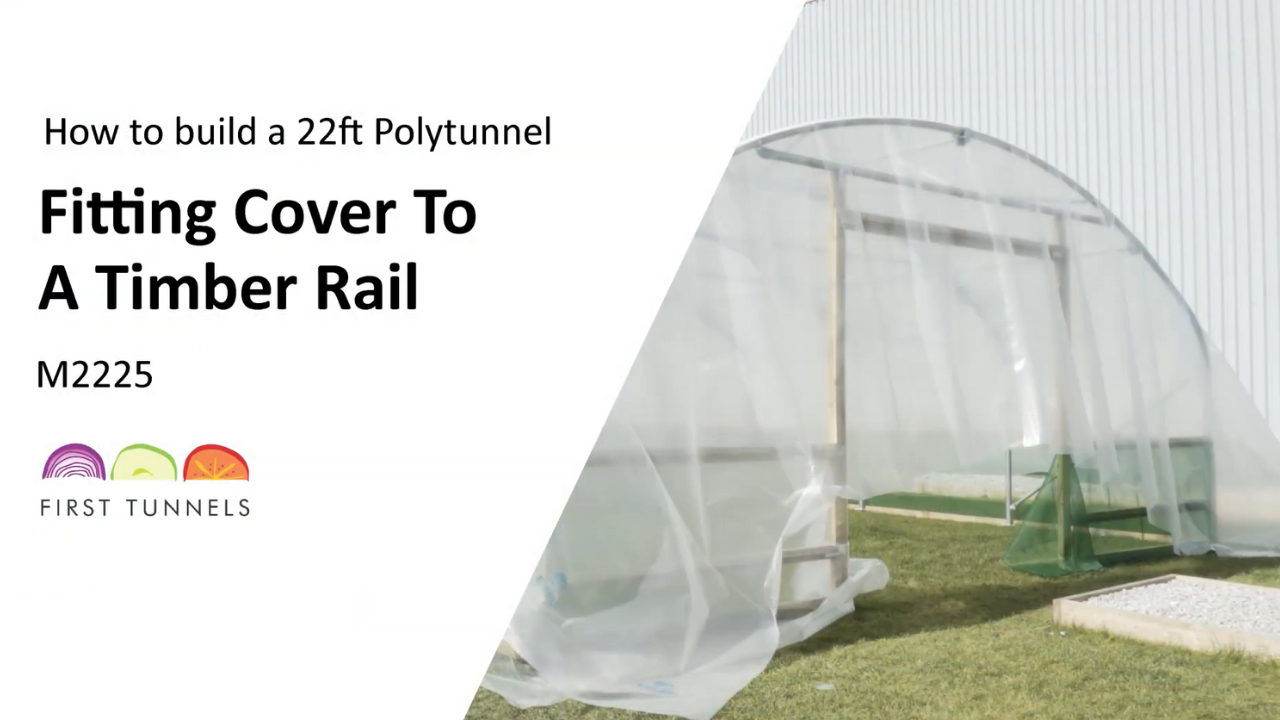


The polytunnel cover is secured to the side rail or base rail and around the door frame by trapping it between a rebate batten and a sheeting batten. Battens are 19mm x 38mm timber and come in 1.8m lengths and you will be required to cut them to size (TIB18). The battens are secured in place using nails (CN50). First fit the rebate batten around the door frame, it is fitted on to the outer edge of the frame, it is fitted on to the outer edge of the frame. Start by positioning a batten horizontally across the door frame lintel. Make one end flush with the outer edge of the door frame post and make a mark on the batten where it meets the outside edge of the opposite door frame post (fig 23a). Cut the piece to size.
Ensure when fitted the sheeting batten doesn’t protrude the inner edge of the door post. We recommend using a spare piece of batten as a spacer. Reposition the rebate batten on the door frame lintel. Position the spacing batten so it is flush with the inner edge of the door frame lintel. Once in position secure the rebate batten to the door frame lintel with nails. The rebate batten should overhang the outer edge of the door frame lintel by approximately 5mm.
Next install the rebate battens down the door post. If you are fitting your polytunnel cover to a side rail the rebate batten needs to fit between the rebate batten fitted to the door frame lintel and the top edge of the side rail. If you are fitting your polytunnel cover to a base rail then this rebate batten will extend to the top edge of the base rail. Position the rebate batten and use the spacing batten to ensure it is in the correct position and then secure in place with nails. Fit the rebate batten to the opposite door frame post in the same way and then repeat this entire process to fit the rebate batten to the door frame on the opposite end your polytunnel.
Fit the rebate batten to the base rail or side rail. The rebate batten is fitted to both options in the same way. Please note, if you are fitting your polytunnel cover to a side rail, rebate battens are not fitted to the base rail below. Only fit rebate battens on the rail the polytunnel cover is being attached to. Measure and cut a piece of batten to fit between the door frame post and corner hoop. Position the spacing batten flush with the bottom edge of your side or base rail, position the rebate batten on top and secure it to the rail using nails. Continue down the length of your polytunnel and then around the corner to the door post on the opposite end of your polytunnel. The corner edges are sharp and could potentially rip the polytunnel cover when you pull the cover over the structure. Remove the sharp corners with a saw. Install anti hot spot tape onto the sawn corners to give extra protection.
Achieving a tight fit on your polytunnel cover will result in a better performing polytunnel. To achieve a tight fit, we will raise the side or base rail, attach the cover and then lower it into its original position. If you have ordered side ventilation the base rail will not need raising. Only raise the rail that your polytunnel cover is being attached to. This process tensions your cover and ensures you achieve a drum tight fit.
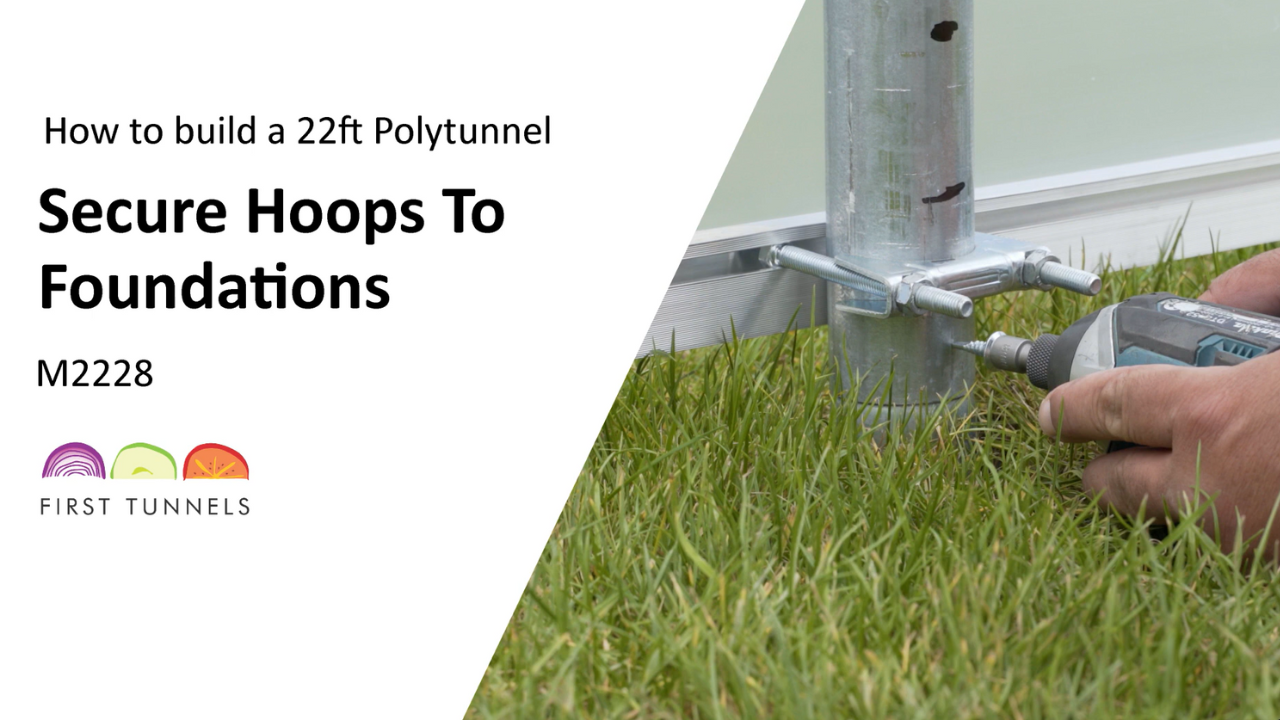
Make a mark on each hoop where the U clamp is on the corner and intermediate brackets. Then measure up 6cm and make another mark. Loosen the brackets, lift them to the 6cm mark and re-tighten. Repeat this on all hoops.
NOTE: The side rail will pivot enough to accommodate this where it is attached to the door frame post.
The polytunnel cover will be trapped between the rebate batten and a sheeting batten around the door frame. To help complete this process as quickly as possible, we recommend pre-nailing the door frame battens. Ensure the nails do not protrude. Nails should be 10cm apart. Measure the length of batten that will be required to fit in between the inner edges of the door post and cut a piece of a batten 1cm short of this measurement to allow for clearance, keep these close to hand. You have now completed all of the preparation and are ready to start fitting your polytunnel cover.
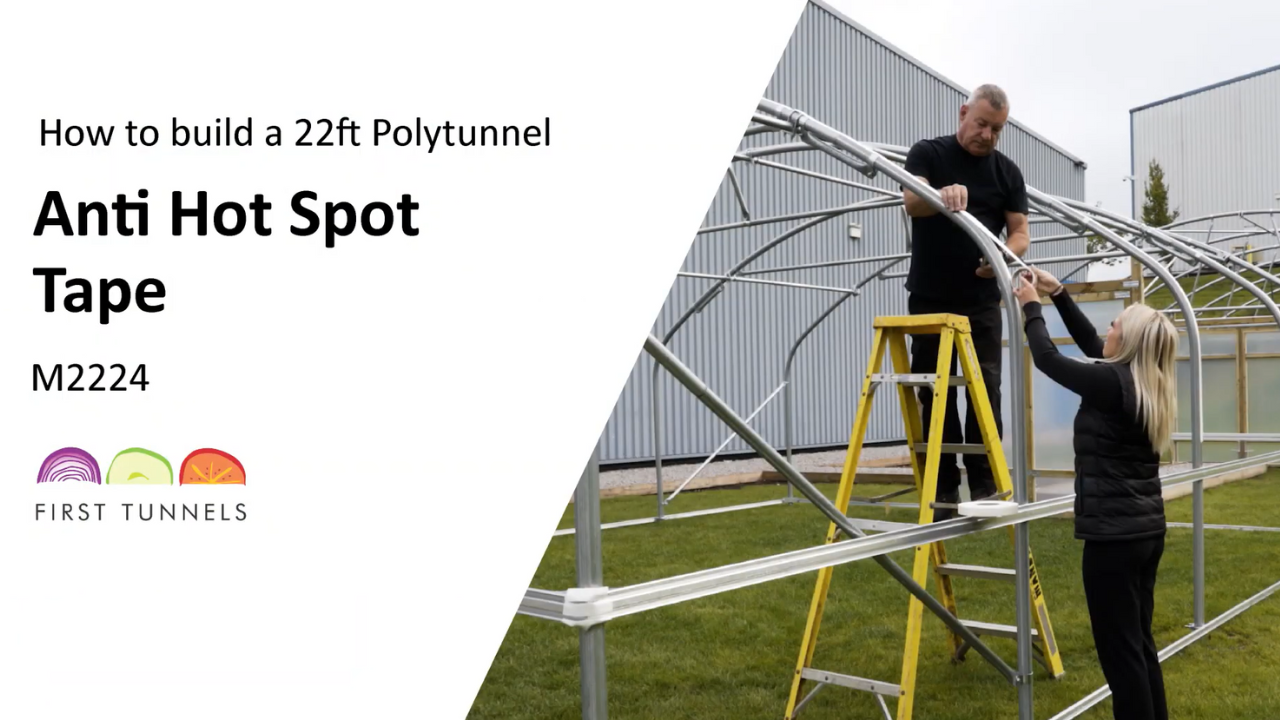
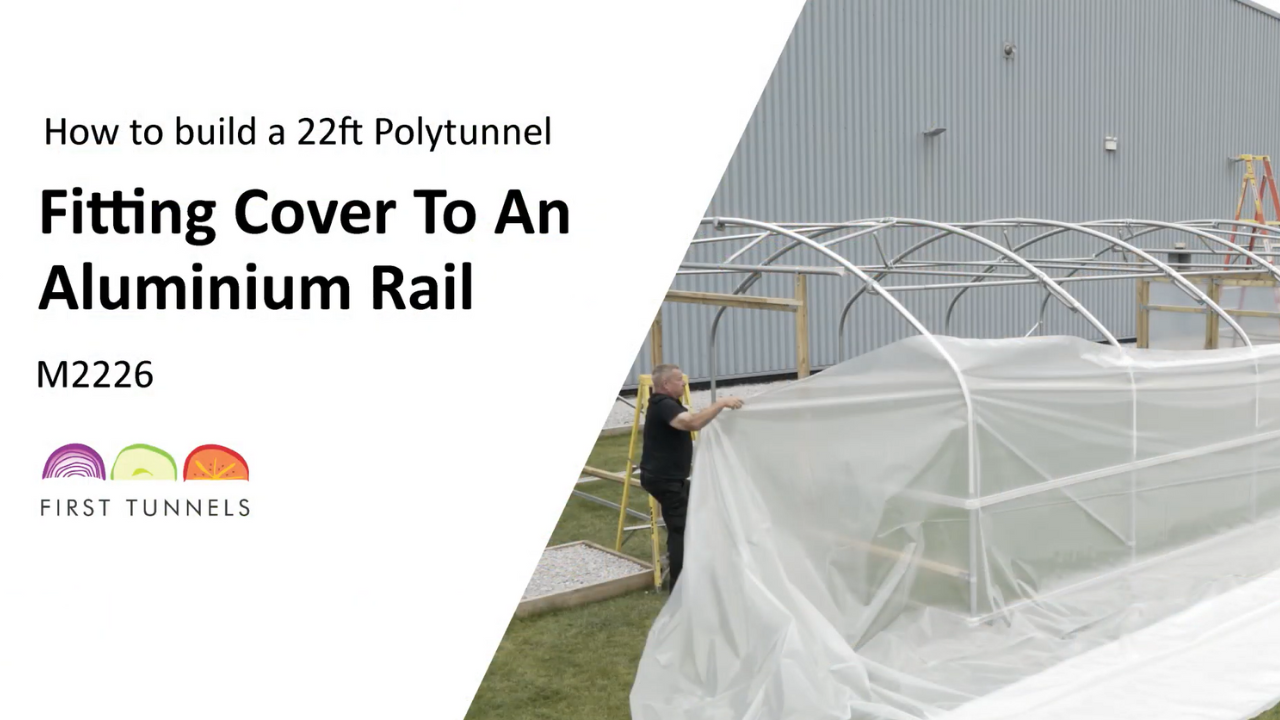
Anti Hot Spot Tape should have been applied to all hoops before commencing the covering operation. Ensure you give yourself enough time to complete fitting your cover. This is not an operation to undertake alone. We also suggest that this is done on a calm day as heavy wind and rain will hinder the process. Only begin fitting your polytunnel cover when you are confident that it can be completed without unnecessary interruptions. Although the polythene is very strong and can withstand a lot of abuse, pulling and stretching the cover can sometimes leave finger marks. To avoid this spoiling your polythene cover, try to grip and pull the polythene on the outer edges, somewhere that will later be trimmed or buried into the ground.
NOTE: Check the ground for sharp objects which may damage the polythene cover. If you have enough room, roll the cover out down the length of your polytunnel. There is NOT a right or wrong side when choosing which face goes on the inside or outside of the structure.
Loosen the folds of the polythene cover. With one person at each end holding a corner, pull the cover taut and begin to slide the polytunnel cover over the hoops (fig 23b). From the corner of the polytunnel structure walk across the width to the corner hoop, the cover should slide up over the hoops smoothly. If you are short on space or have a very long polytunnel you can roll the polythene cover out on top of the polytunnel from one end to the other. You can then unfurl the polythene cover.
Centralise the polytunnel cover along both the length and the width of the polytunnel (fig 23c). The cover should reach approximately halfway down the door frames. Don’t expect the polythene to reach the ground at the door ends (fig 23d). With the polytunnel cover loosely in position it is time to start securing it into place. At one end, trap the polytunnel cover under the sheeting batten on the door frame lintel and secure the 15cm central section, approximately 3 nails (fig 23e). Do not nail the entire length of the batten to the frame at this stage.
Now go to the opposite end of your polytunnel, pull the cover tight along the length. You will need to get as much tension on the cover as possible, a good approach is to pull the cover down and swing into the polytunnel using your full body weight whilst your assistant positions the second prepared batten and secures the 15cm central section, approximately 3 nails (fig 23f). Next, fix the polytunnel cover down the length of your polytunnel to the timber base rail or side rail if you have ordered side ventilation. The opposite side of the polytunnel has yet to be fixed so simply tension the polythene enough to rid the cover from any creases and ripples. Starting in the centre on one side of the polytunnel, fix the cover into the rebate using the 1.8m prepared battens working to either end (fig 23g/h/i).
Once one side of the polytunnel cover has been fixed, repeat on the opposite side using the same method, however as the cover has been fixed on the opposite side, more downward force on the polythene can be applied to achieve a tight cover. At the corner where the cover has been fitted to the timber rail, below this rail cut the polythene parallel with the end hoop (fig 21j). This frees the polythene at the corner allowing pleating and fitting to the door frame post. Carefully pull the top door batten slightly away from the door frame lintel, pull down on the polythene and begin to tuck the polythene behind the batten. Secure a few nails at a time. Work from the centre to both sides until the door frame lintel batten is fully secure.
Now we will secure the polythene cover to the door posts. You’re looking to achieve consistent pleats (fig 23k). We recommend you do a dry run to gauge the amount of pleats for an even distribution. The pleats start at the centre and dissipate as you reach the straight side of the polytunnel hoop. Position a batten down one of the door posts and hammer the first 2 or 3 nails in. You will continue to pleat the polythene down the sides. Pull the cover as tight as you can and secure a couple of nails at a time (fig 23l). Keep working down the door post. If you are fitting the cover to a base rail, you will secure battens to the bottom of the base rail. If you are fitting the cover to a side rail, secure a batten down to this rail. Repeat this process to secure the cover to the other door frame.
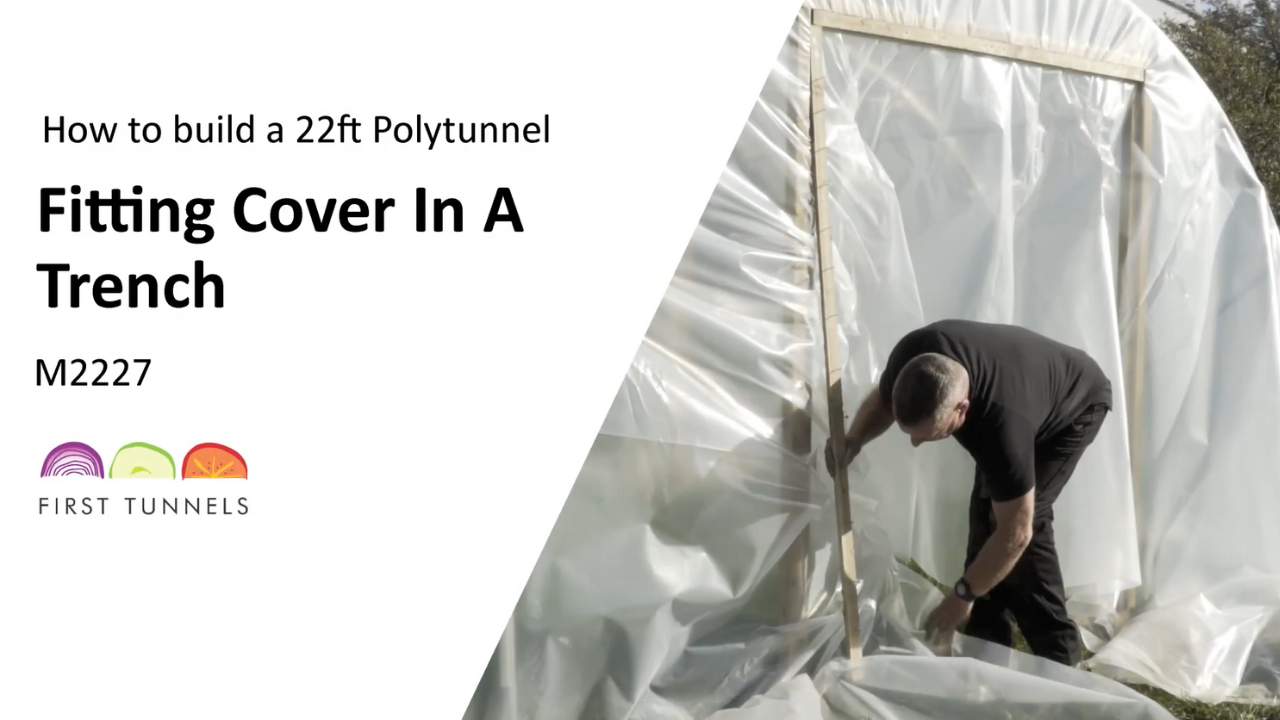
Next you will need to tension the polytunnel cover. When covering is complete, loosen the base rail or side rail clamps, push the timber rail down to its original position to tension the cover and re-tighten the clamps (fig 23m). Now secure the polytunnel cover to the base or side rail that spans from the door post to the end hoop. Measure and cut a piece of batten to fit, pull the polythene down and secure in place. Repeat on both side and then on the opposite end of the polytunnel. It is now time to trim off any excess polythene. Carefully cut the polythene around the door frame. If you have fitted your cover to a side rail, cut off the excess along the corners and length, take care not to cut the ventilation netting. If you have attached the cover to base rails some of our customers choose to bury the polythene skirt.
Click to enlarge

23a

23b

23c

23d

23e

23f

23g

23h

23i

23j

23k

23l

23m