


All of your base plates should be in line and evenly spaced. Take all measurements from the centre of the base plates. To get started, we’re going to measure and position the base plates of the four corners of your polytunnel.
NOTE: At this stage, don’t secure them as we may need to adjust them.
Choose a corner and position the first base plate. From the centre of the base plate measure down the length of your polytunnel, i.e. 30ft, 36ft, 42ft etc. and position a base plate where your polytunnel ends. You have now temporarily positioned base plates in two corners. Using a surveyors tape to measure the diagonal and a conventional tape measure to measure the width, use the tapes in tandem to position the base plate for the third corner. Repeat this procedure at the other end and position a base plate in the final corner. Finally, measure the length between the third and fourth corner base plates to ensure it is the correct length for your polytunnel.
NOTE: It is essential that your foundations are set square. This can be achieved by ensuring that both diagonal measurements, from corner to corner, are equal. This measurement is different for different sizes of polytunnel. We have listed the diagonal measurements in your construction booklet below:

If your size isn’t listed we also have a useful polytunnel diagonal calculator available online that calculates this important length – please visit here. (firsttunnels.co.uk/diagonal).
Using the example size below, a 22ft x 36ft would have diagonals that equal 12.86m.

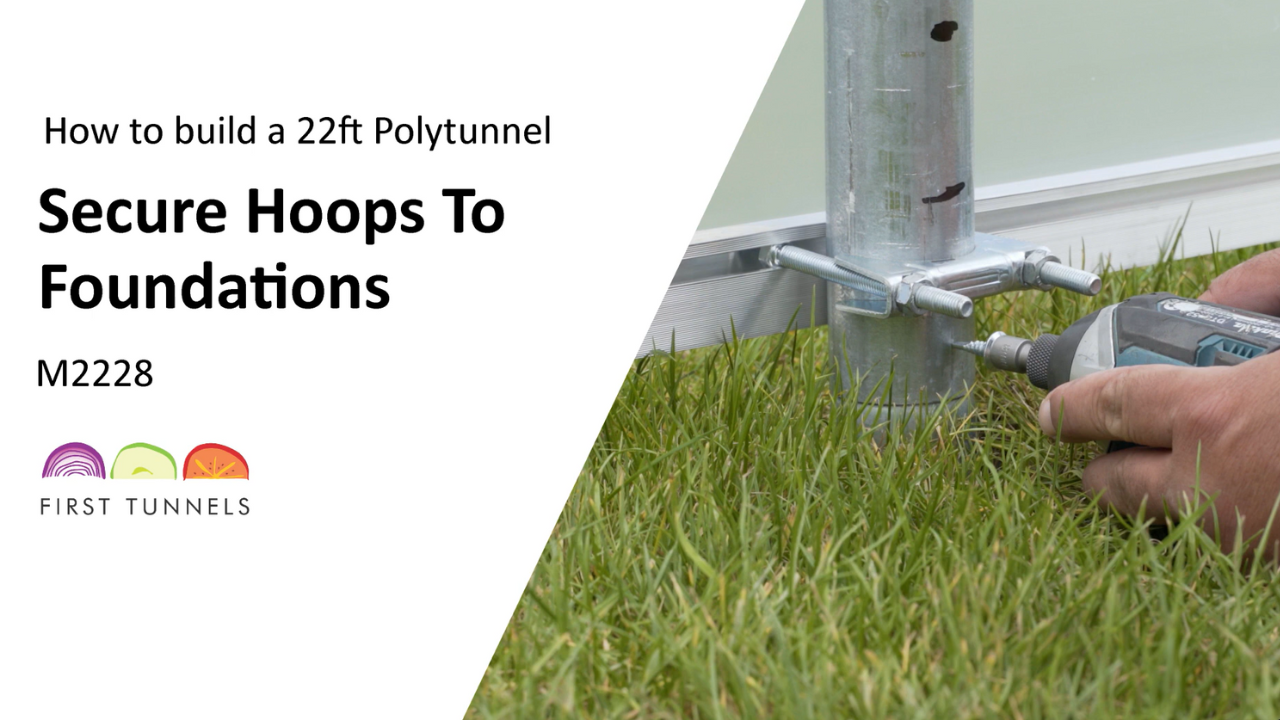
Choose a corner to start and use a pen to put a mark on the floor in the bolt holes. Put the base plate to one side. If you are securing the base plates to a timber base drill a hole using a 7mm wood drill bit 8cm deep. Reposition the base plate and tighten the bolts with a 17mm socket to secure in position (fig 3a). If you are securing the base plates to a concrete base drill a hole using a 16mm masonry drill bit. Separate the shield from the bolt and place the shield in the hole. You may have to use a hammer. Reposition the base plate and tighten the bolts with a 17mm socket to secure in position (fig 3b). Measuring from the centre, double check your measurement down the length of your polytunnel and repeat the process on the second corner.
Now you have secured the two corner base plates. Repeat this for the remaining two corners, checking the measurements before securing.Using a taut string line to ensure that the base plates are inline, you can now measure the position of the intermediate base plates.
NOTE: The intermediate base plates should be set at 6ft spacing.
Once all of the intermediate base plates are in position, one by one, mark the drill holes on the base, remove the base plate, drill a hole and then secure the base plate as shown earlier. Once all the base plates down one side of your polytunnel are secured into position you can now repeat the process on the opposite side. Please remember to double check that your foundations are set square by re-checking your measurements.
Click to enlarge

3a

3b